Teaching Tech Tip: Getting Organized with the Moodle Checklist
![]()
Take advantage of extra time in the summer to get your Moodle courses organized! Consider integrating Moodle Checklists into your courses to help students manage their time and stay on track. You can break an entire course, project, or module into smaller, manageable tasks and link them to an interactive checklist. Students can prioritize tasks, allocate time, and strategize their approach to completing the Checklist, and you can also choose to give graded credit to students when they complete the Checklist.
To start, set up your course or module, including components like Assignments and Quizzes that can be linked in the Checklist. This will help you reflect on course activities and get organized as you create titles that help students understand what to do in the Checklist view. Activities in the Checklist will be checked off automatically upon completion, or students can manually check them off. Learn how to get started in our guide and view Checklists in action by enrolling in our Teaching with Moodle course.
 Teaching Scenario: Students have a semester-long project with multiple components. They will complete small activities, do some peer work, review related resources, and meet with the instructor before submitting the final project as a Moodle Assignment.
Use Moodle’s activity/resource chooser to add all of the project components to Moodle. The list below is an example of a series of activities and resources that you could add to Moodle or plan for students to complete without a Moodle component:
- Panopto video that is a recording of you explaining the project
- Page with the overview of the project and a rubric for assessment
- Link (URL) to the Libraries research consultation request page
- Page explaining an interview requirement for the project
- Quiz on research procedures
- Reminder to complete the interview and initial research (no activity in Moodle – manually added to the Checklist)
- Reminder to set up a meeting with the instructor for topic approval (no activity in Moodle – manually added to the Checklist)
- Moodle Workshop to submit a draft of the final assignment and get peer feedback
- Link (URL) to rubric with a reminder to review it before final submission
- Final Assignment submission
Then go to the “add activity or resource” button in Moodle and choose the Checklist activity. You will have options for students to add their own items, add a grade for the Checklist, link to course modules/activities, and more. After initial setup, you can then create the checklist items by linking to existing course activities, i.e., Page, Assignment, etc., or you can type in additional items for students to complete. Place the Checklist at the start of the project to help students stay organized or at the end of a module as a final check before students submit the project.
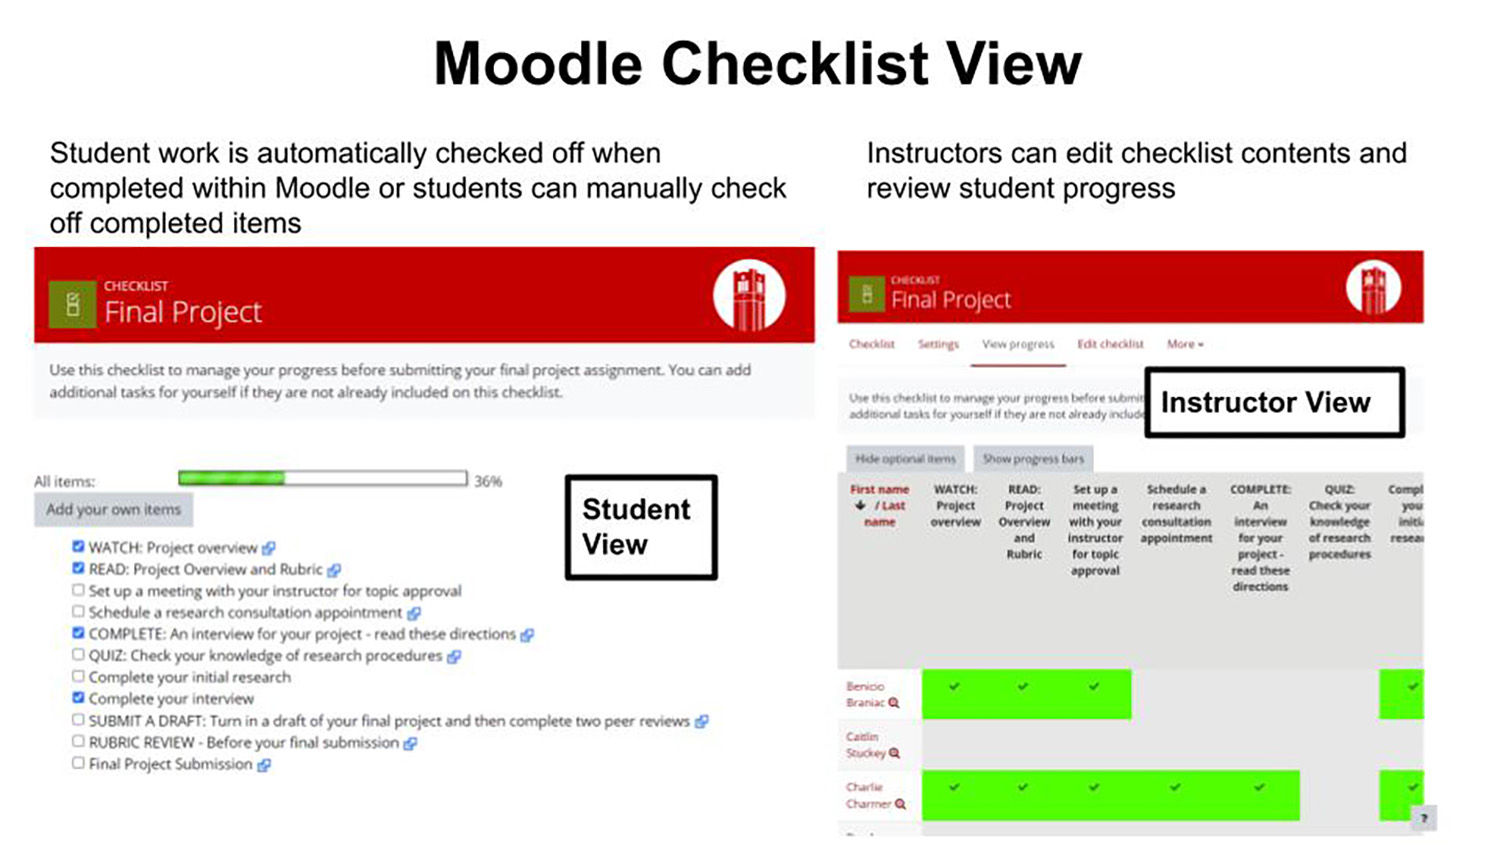
Students will then be able to interact with the checklist, and you will be able to monitor their progress. View the student and instructor view of a sample checklist.